Introduction
SafeCount is a self contained occupancy reporting solution for applications where local reported only is required.
It should be noted that utilising SafeCount does not preclude additional internet connection(s) for remote management (Estate Manager) and/or reporting (True Occupancy), SafeCounts main use is to provide local reporting. But the SafeCount wizard must be run locally using a web browser connection to each device in turn.
Note you cannot run the SafeCount Setup Wizard via the RIFT.exe software, or remotely via Estate Manager, so ensure that SafeCount is fully configured locally, before leaving site.
If you have just a single device then simply go ahead with connecting to that unit and running the wizard, but if you have two or more devices, setup the device(s) you've decided will be Secondary devices first.
Until devices are configured to work on the same network - i.e. with unique IP addresses - you should leave all devices powered off and only power them on one at a time as you go through configuring, starting with the Secondary device(s) first.
If using a customer facing screen with a built in web browser, this can be used to access the Vectors and configure them. In this case, configure the IP screen first so that it is on the network with the Vectors. Alternatively, a laptop will be required to connect to each device.
Setup Wizard
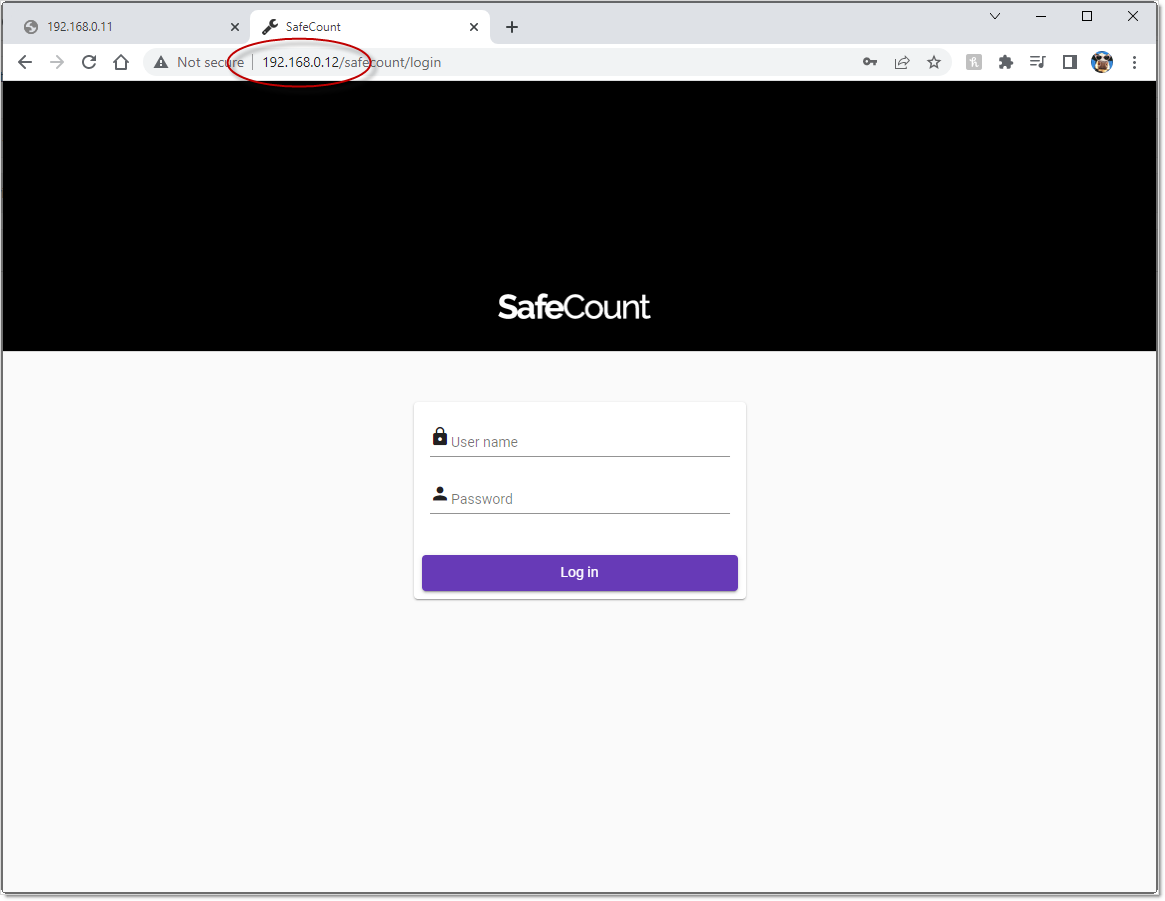
Power on the first device. Connect to it using the assigned IP address via a web browser.
Remember that new, un-configured, Vector Analytic devices come from the factory with a default IP address of
192.168.0.10.
When first connecting to a device the main login page will be displayed. Do not login, but instead click the SafeCount link in the top right of the web page:

If you have previously connected to other devices on the same IP address, it is possible that your browser will take you straight into RIFT, and the underlying settings. If this happens, click the 'Actions' menu, then choose 'Log Off' in order to take you back to the above screen.
The SafeCount functionality will then load:

A similar 'SafeCount' version of the login page will then be shown:
 The default username and password required for SafeCount access is:
Username: admin
Password : installer
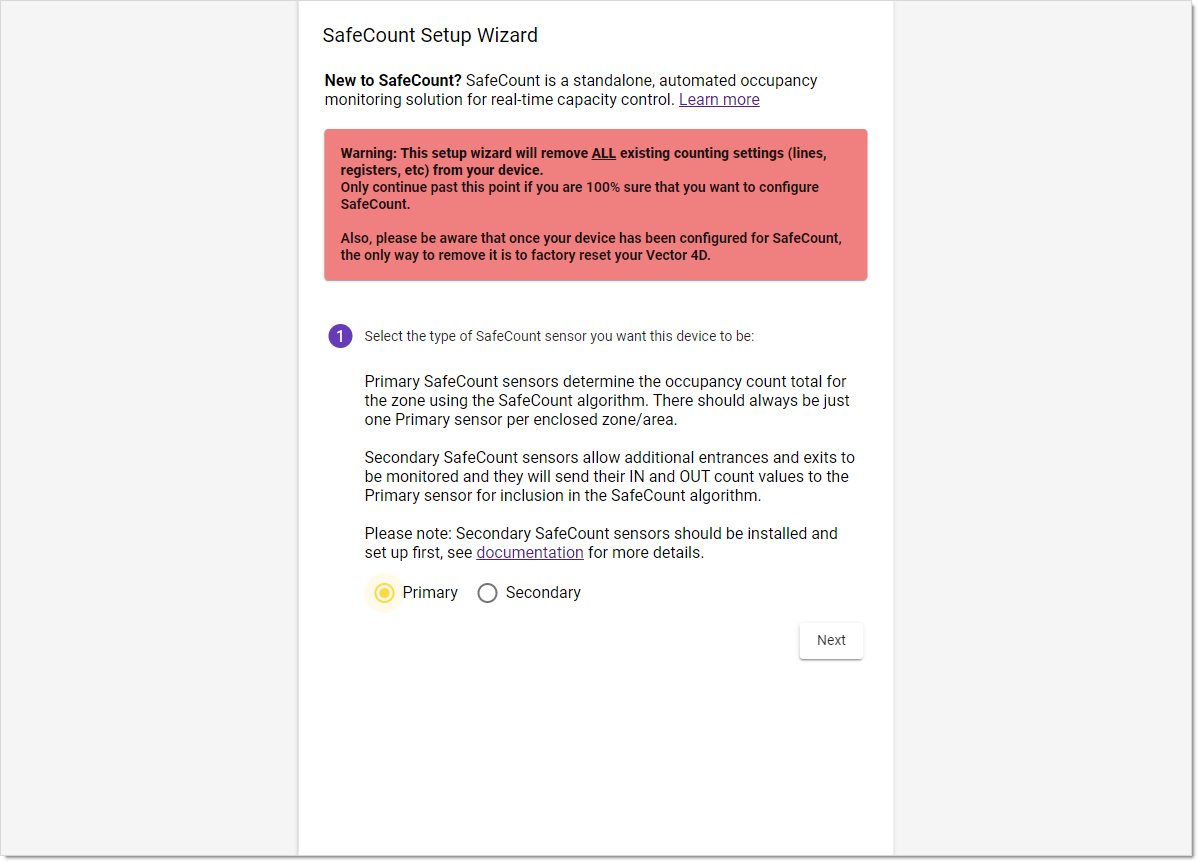
The Setup Wizard will then launch:
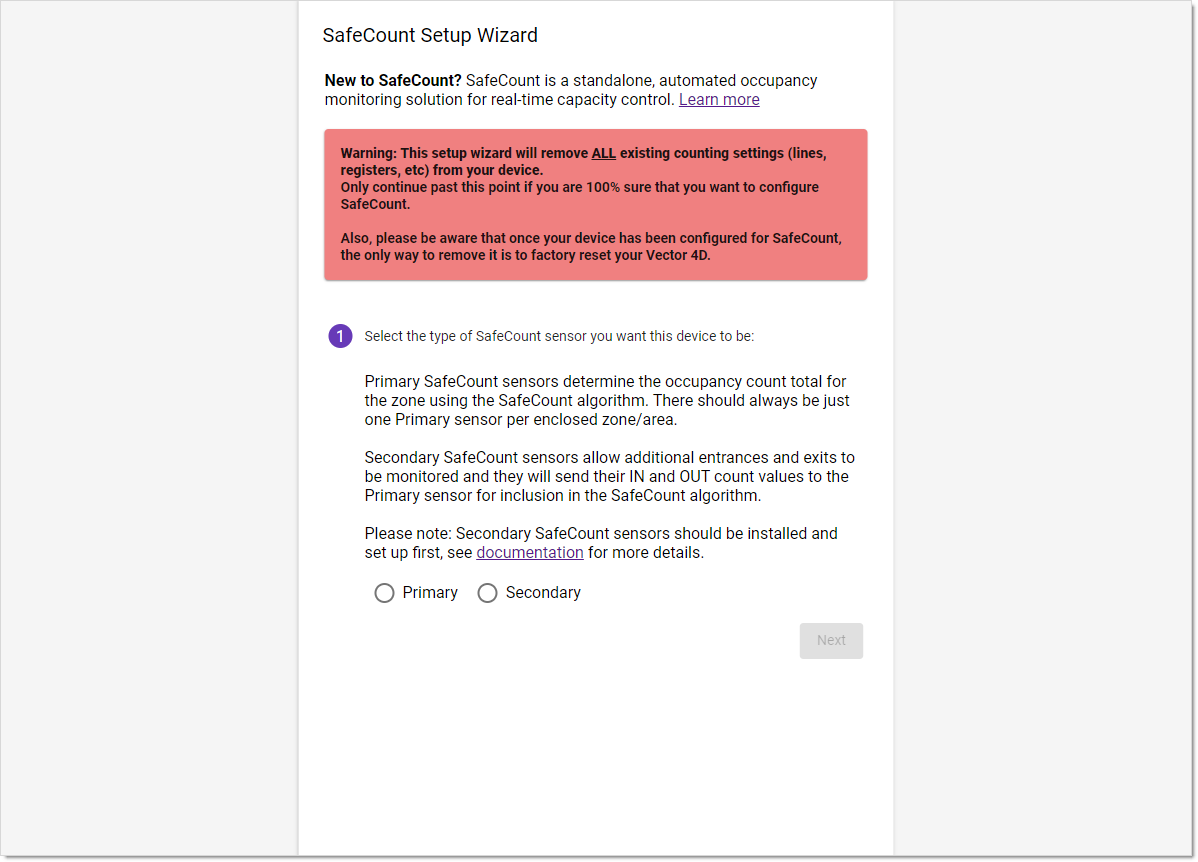
Please read the warnings provided here, before continuing.
As mentioned previously you should run the Wizard on any Secondary devices first. If you have only one device skip ahead to the Primary section below.
Secondary Setup
If you only have one device (or one doorway), skip straight to the Primary Setup section below.
The first step is the network settings:
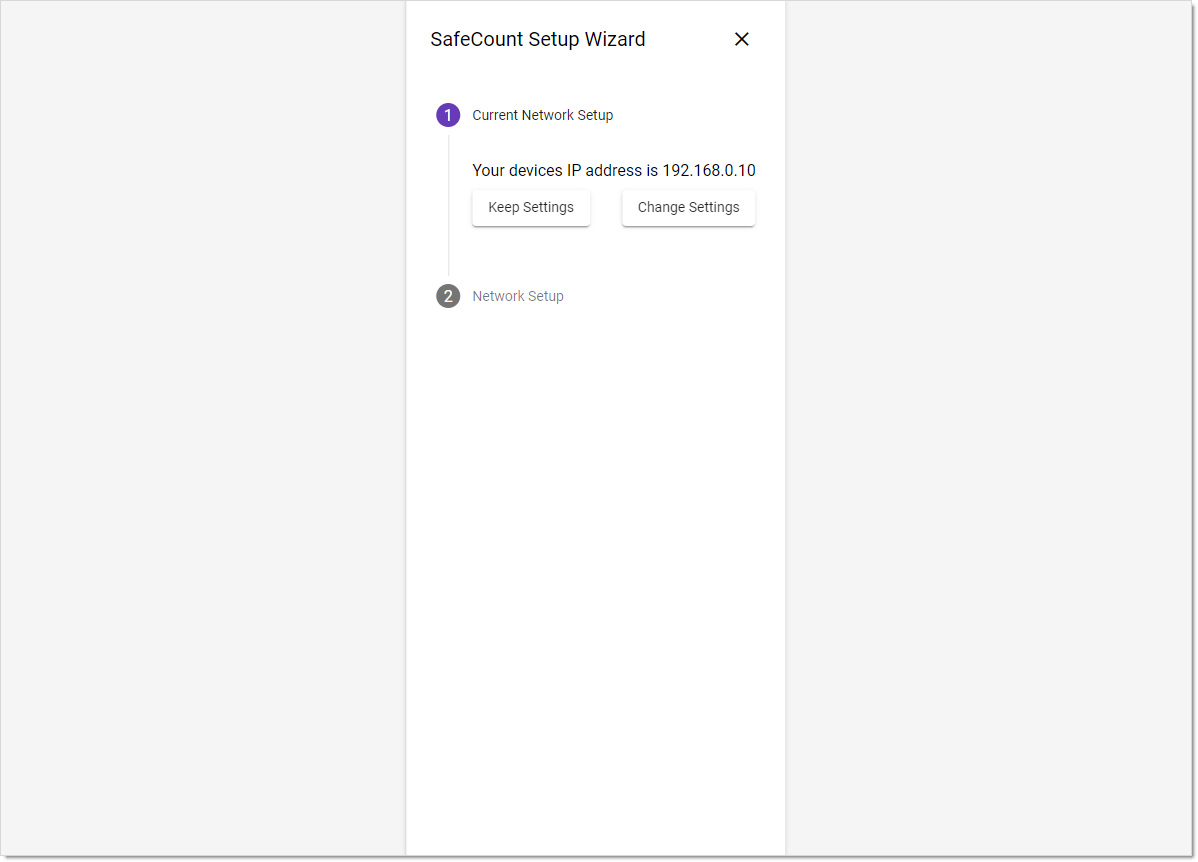
Remember that all devices have the same default IP address of 192.168.0.10, so at this point you should change the Secondaries address so that you will be able to connect to the next unit on this same 192.168.0.10 address.
Click the 'Change Settings' button to set a different IP address, or 'Keep Settings' to move on.
Changing settings:
 DHCP is recommended when a DHCP server is reachable on the network, but in all other cases you should manually configure unique IP addresses.
If you enable DHCP, remember that you'll need a method of determining the assigned IP address so as to be able to reconnect to the device!
Click the 'Complete Network Setup' button when finished.
Note that at this point the new address will be configured and the web connection will be re-established using the new details:
If this reconnect fails, you may have to wait a few seconds and then click the refresh button on your browser. If it refuses to connect, double check that that the settings are valid. When DHCP is enabled you will need to find out the new assigned IP and manually type it in again. You may need to factory reset the device and start again if it remains unreachable.
Login again, when the site re-appears. You can make changes to the Network setup if required - otherwise click the 'Keep Settings' button.
Next you need to tell the device how it has been installed so that the correct IN and OUT direction can be determined. Ensure that you enter the correct details here or the IN and OUT directions could be reversed and the Occupancy Calculation will be incorrect:
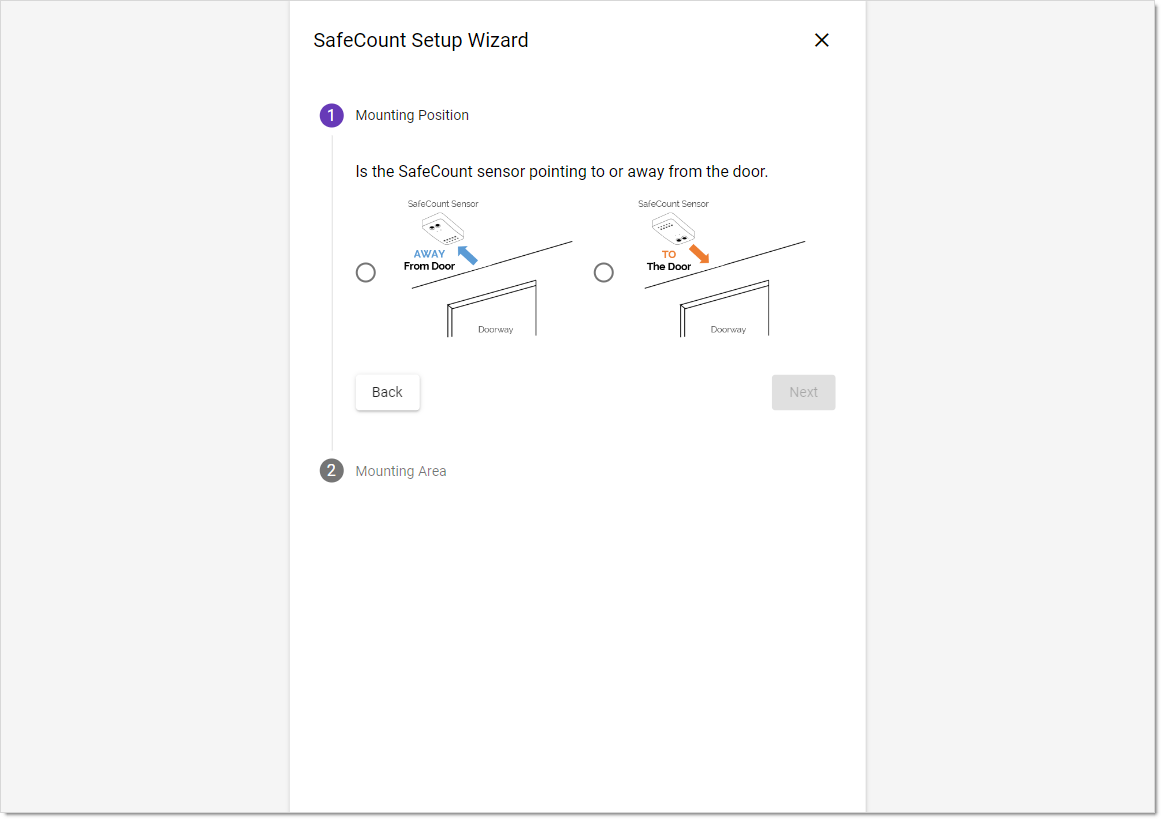
In the two options, note the relative positions of the Vector's lenses and LED array in relation to the door, and choose the option that corresponds to your device's installation.
If you have installed as recommended, then the Mounting Position will be 'Away from Door', but double check the orientation to be sure.
Click the 'Next' button to proceed:

The next question in combination with the preceding question allows the IN and OUT direction to be established:
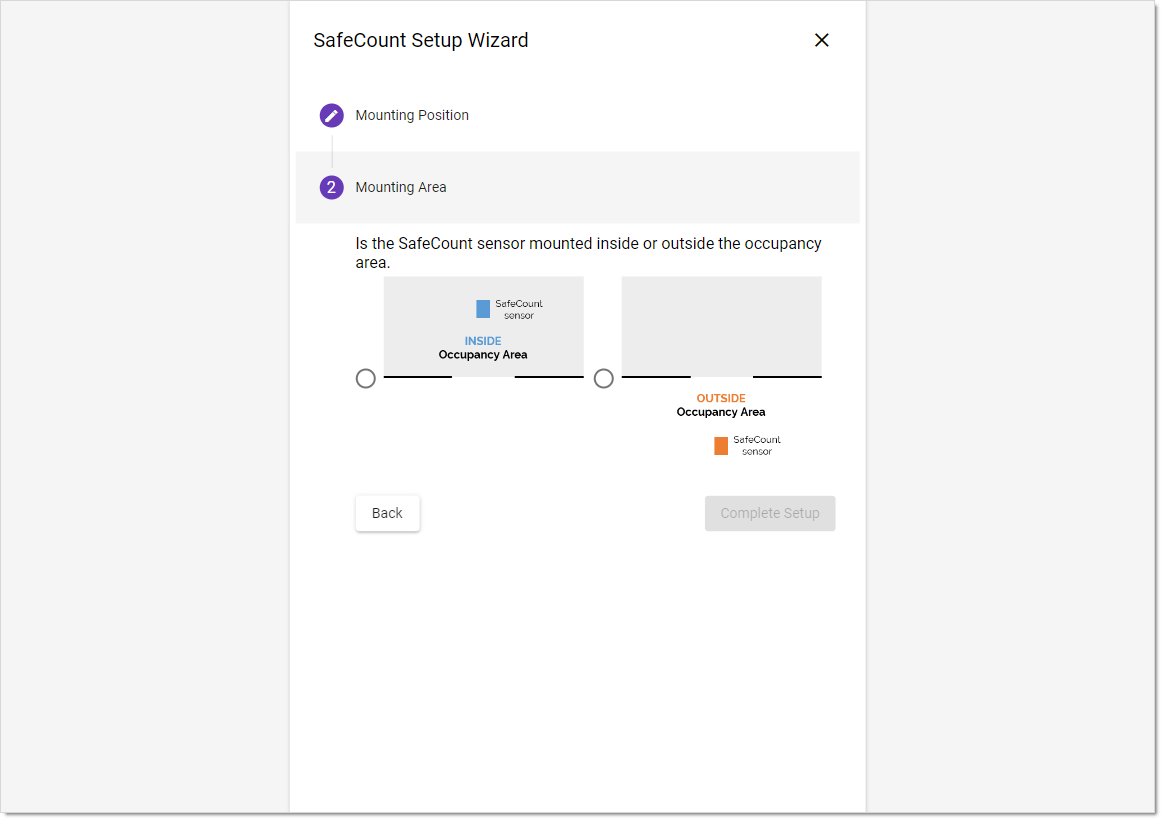
If you have installed as per the recommendations, the Device will be 'Inside Occupancy Area'. But again, double check. Click the 'Complete Setup' button when finished:

The setup will then be finalized:

Once complete the SafeCount functionality will reload with the new settings:

The main Settings page will then be shown:

At this point you can disconnect from this unit and proceed with the next.
Don't forget to do all of the Secondaries, as above, before configuring the Primary device last.
Primary Setup
Select Primary and Click the 'Next' button:
The first part is the Network setup:
 You can either leave with the current setting or change to something else.
Click the 'Keep Settings' button to continue, or 'Change Settings' to modify.
The next part is entering the site details:
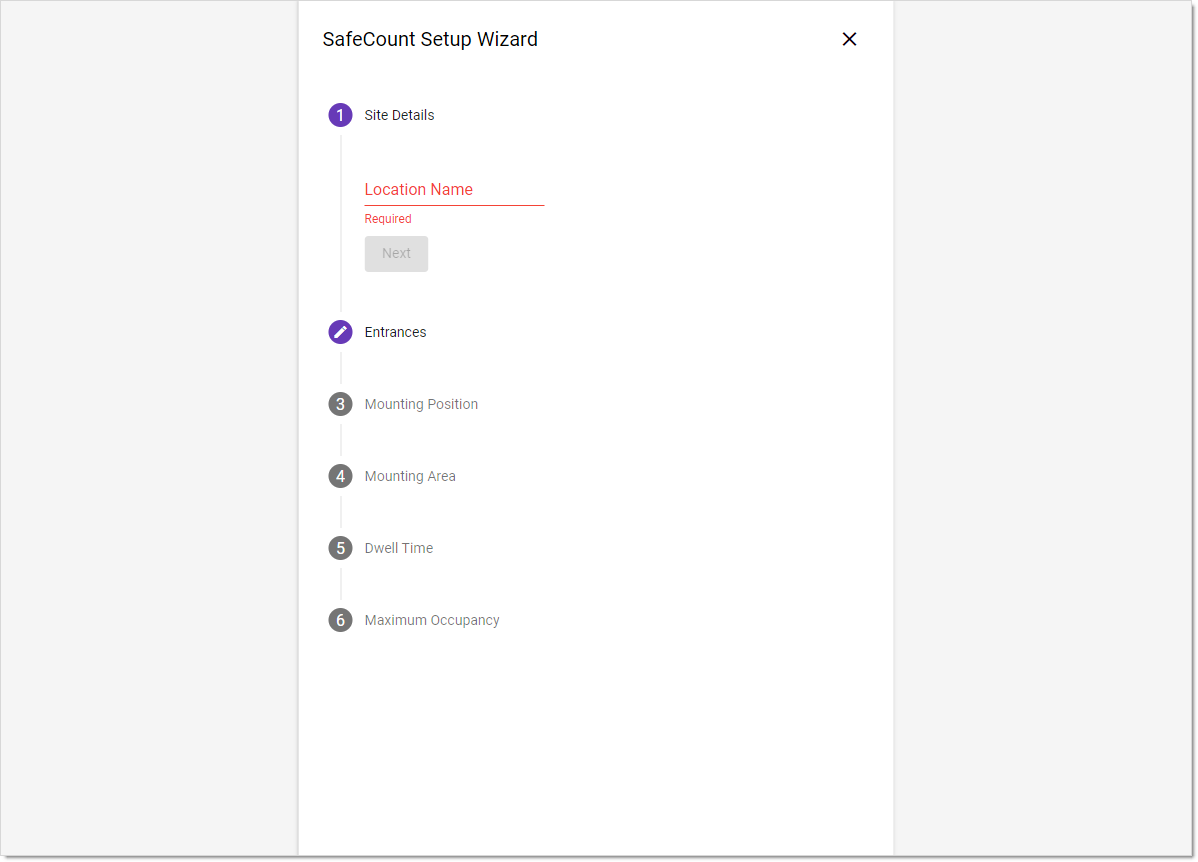
Enter a suitable Site/Location name based on the retailer or smart building customer.
Remember that the Location name will be displayed on the customer screen if used, so choose a suitable description here - check with the customer is required.
Examples:

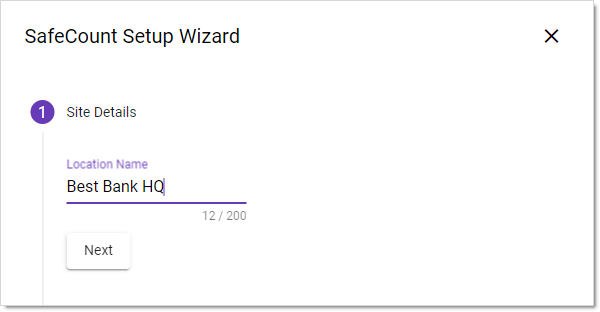
Click 'Next' when done.
Any additional Secondary units will now be shown if found on the network:
 As per the message here, if you were expecting other units to be found, stop at this point and fix the issue preventing their discovery.
Remember that 'Secondary' devices should be configured first so that they can be discovered correctly at this point.
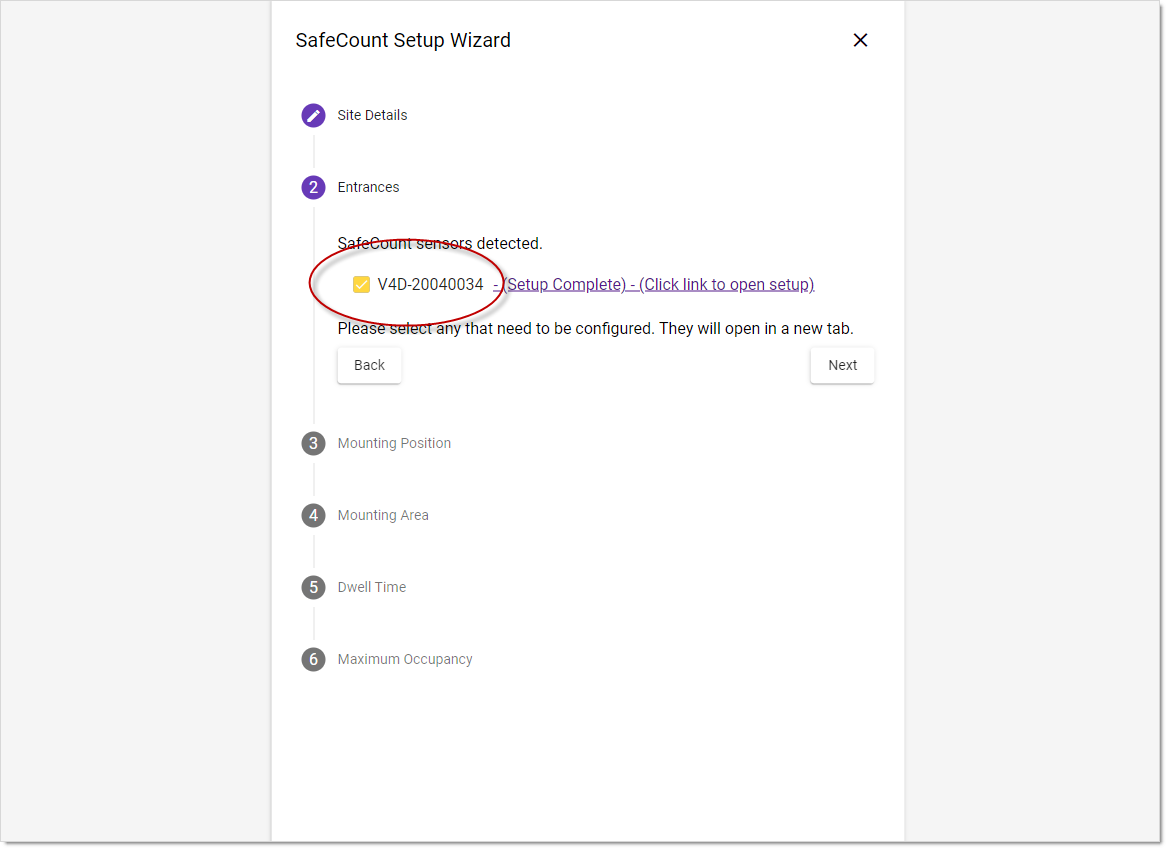
If additional SafeCount units are detected on the network, place a tick next to the ones to be included as part of the zone you are currently configuring: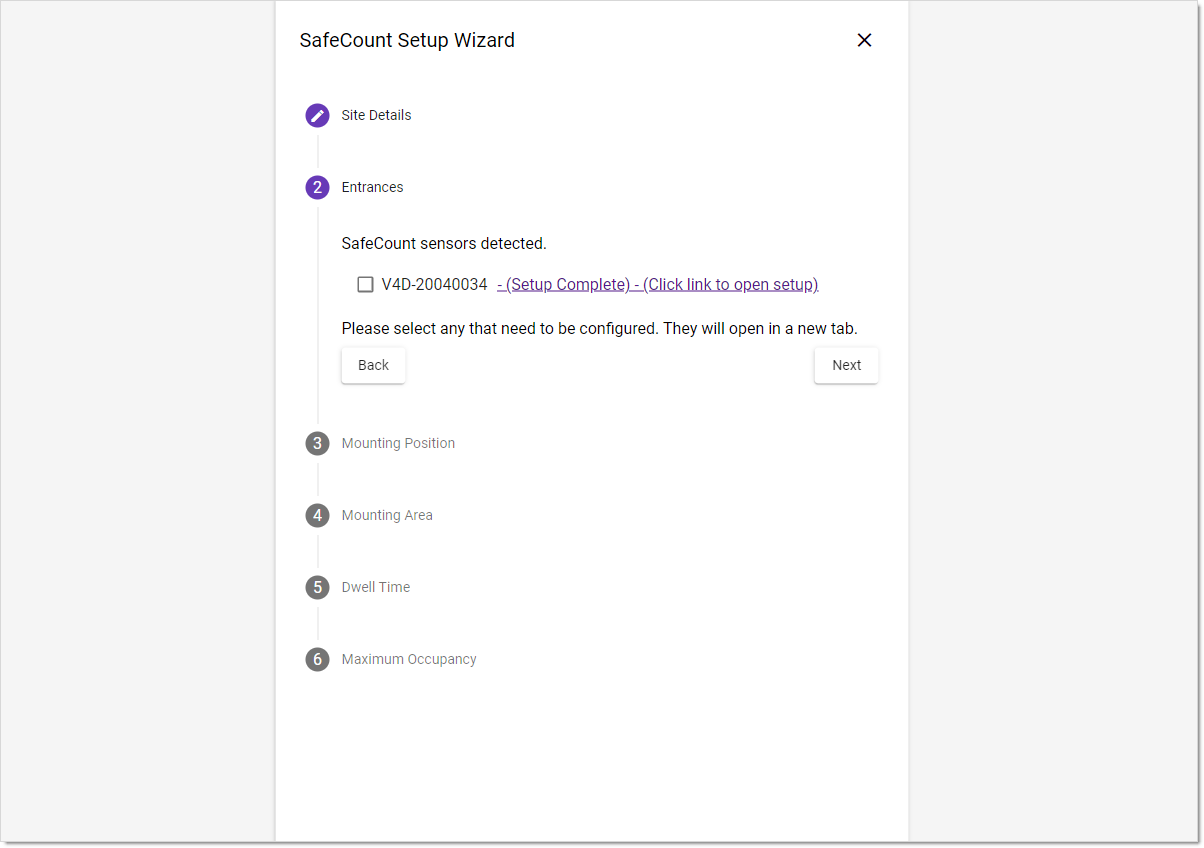
Note that if you multiple occupancy zones on the same network, you must take care to select the correct devices from the list.
Once the correct devices have been selected, click 'Next':
Mounting information should now be entered for this device. This is so that it can determine the correct direction for IN and OUT.
Ensure that you enter the correct details here or the IN and OUT directions could be reversed and the Occupancy Calculation will be incorrect:

In the two options, note the relative positions of the Vector's lenses and LED array in relation to the door, and choose the option that corresponds to how you have installed your device.
If you have installed as recommended, then the Mounting Position will be 'Away from Door', but double check the orientation to be sure.
Click the 'Next' button to proceed.
The next question in combination with the preceding question allows the IN and OUT direction to be established:
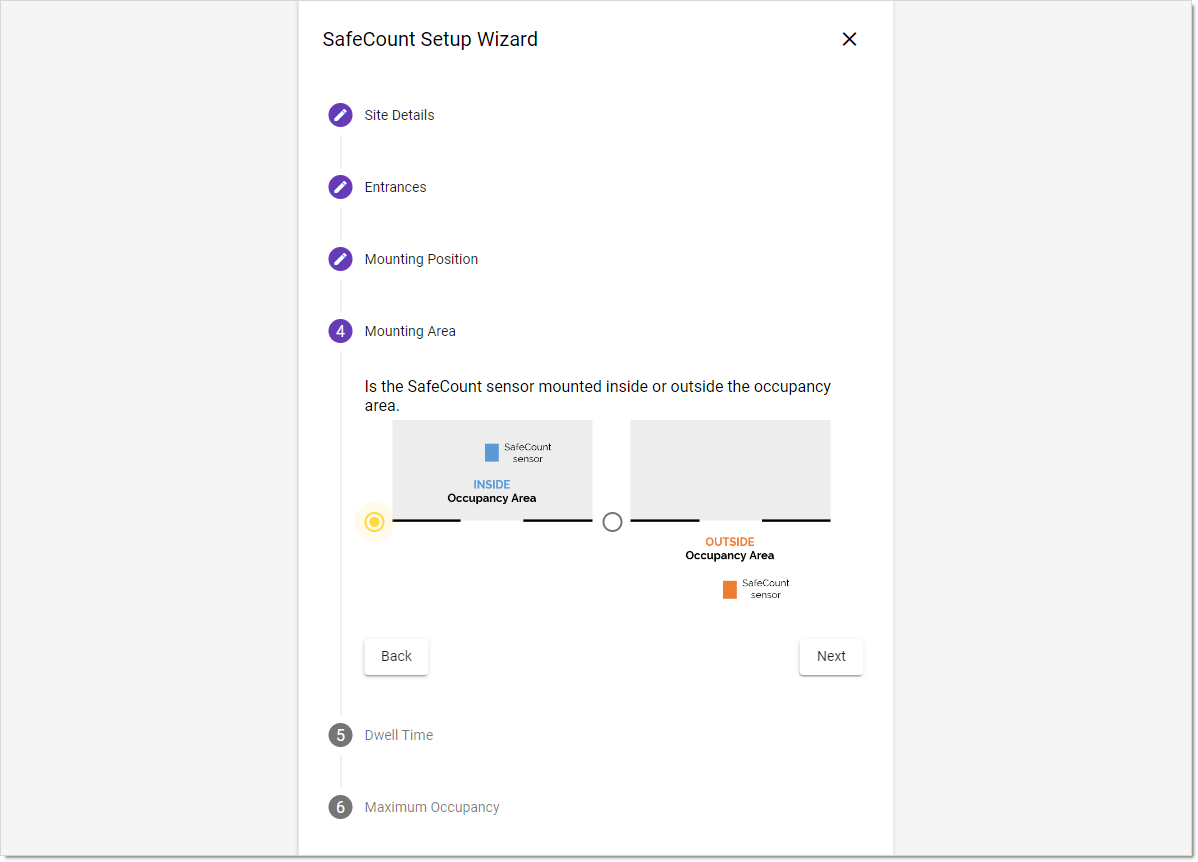
If you have installed as per the recommendations, the Device will be 'Inside Occupancy Area'. But again, double check. Click the 'Next' button to continue.
Now you must enter a 'Dwell Time'. This 'Dwell Time' is essentially the maximum time each person will typically spend in the occupancy area and is used to 'timeout' any people seen entering but not leaving. It is used to 'back correct' any over count bias in the occupancy. Choose from the available options, and then click 'Next':

Lastly, you need to set the maximum occupancy values:
 These two values are required for alerting.
If Traffic Lights are utilized, the maximum value is used to switch the lights from Green to Red.
If a customer screen is used it will go Yellow when the high value is reached, and Red when the Max value is reached.
Liaise with the manager on site for required values here.
Click the 'Complete Setup' button when done.
At this point the Configuration will be finalized. This may take a while:

Note that at this step final settings are also sent down to any other Secondary devices on the zone as well, and as such, may be prone to network issues. If an error occurs hit Retry/Refresh.
If all is well, the main SafeCount Customer View page will be shown:
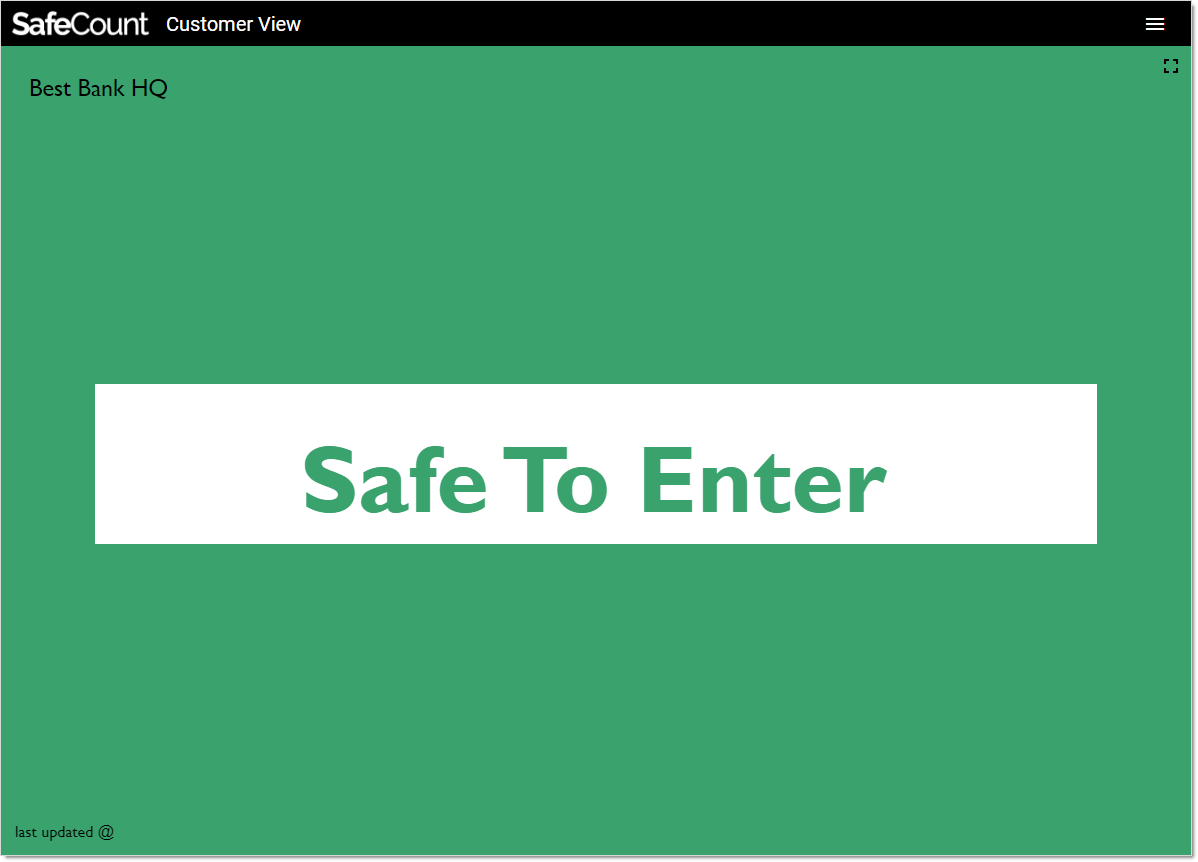
If using a customer screen this is the view that should be left. To show this page on other screens simply open a browser window and enter the IP address of the Primary device, then choose the SafeCount link again.
To manually alter the Occupancy count you can go into the different views available and choose the 'Manager' view. See here for more details.
Note if you have installed in the middle of a day where people have already entered, then the occupancy value will be incorrect - until it has had time to back correct.
If the Dwell Time is very short - for example in a rest room - then the occupancy value will back correct quite quickly, but bigger areas with longer dwell times will not start working correctly until the next day once a full Occupancy Reset to zero has occurred.
Once the main Setup Wizard has been run through on each SafeCount device, you will probably need to update some other SafeCount settings such as the Opening Hours of the store/office. To access the SafeCount settings see
here.
It is also strongly recommended that the underlying default settings relating to Counting are tweaked and refined in order to increase the occupancy calculation accuracy. At this point, you should also add any nodes to any masters installed at wide doorways. See
here for details of the underlying settings that can be modified.
For details of using SafeCount on a day to day basis see the usage instructions
here.
If you want to change any of the setup of SafeCount, such as the occupancy values, see here.